


Building a Tiny House on Wheels
24 Jul 2017 Leave a comment
in Building Tags: Exterior, Family & Friends, Fascia, Galaxy Ceiling, Porch, Siding, Soffits, Trim
09 Jun 2017 1 Comment
in Living Tags: Family & Friends, Misc., Siding
Last year I did a post like this, called A Day in the Life, but so much has changed, and I’ve been busy getting my siding up almost every day. 🙂 I’ve been working hard!
Friday
I get up, eat some cereal and yogurt, then tie up my boots and head out to the tiny house.
I cut pieces to length, with the angles for the joints.
I’m getting good at these cuts!
I stain edges, and get my sister to help me put up a few rows. My mum also helps for a bit. I get 4 rows done.
Then I go get ready for work. I work for 4 hours, until 9pm.
My sister and I go to the drive-in and see Wonder Woman and Everything, Everything. 🙂
We get home and I go to sleep at 2am.
Saturday
I get up, eat cereal and yogurt, then go outside.
Some friends of friends happen to drive by, and see me in the yard. They pull in and ask for a tour, which I’m happy to give. We talk for a bit about systems and parking.
Then I cut boards.


I stain the cut edges. I don’t have help today.
I get ready for work, and work for 5 hours. It was crazy busy.
I go out for burgers with my best friend after work.
Sunday
I get up and eat more cereal and yogurt. I’m addicted at this point. 😛
I go outside and get ladders, sawhorses, and boards set up.
I cut, stain, and put up some small boards on the front of the house.
Nails set in a piece for the front wall.
I cut some boards for the back.
Steph helps for a bit, but then she has to work. I have Sundays off. 🙂
Mum helps me get the rest of the boards up on the side walls! She also helps me get a few rows up on the back wall. 13 rows up!

I think I hit a nail… 😛
I finish up around 9pm, then go inside to enjoy my well-deserved supper and Netflix. 🙂
Monday
I wake up early and take my car in to get all-season tires put on (finally).
I start working on the house, and get some cutting and staining done since I don’t have help today. I get some little pieces up around the front window.


A woman who walks past every day calls out, “You’re doing a good job!” as she goes by.
I make myself some food, get ready for work, and work for a few hours.
I spend my evening with friends and we get take-out quesadillas after work. 🙂
Tuesday
I sleep in a little bit after staying up late, then get out to do some more cutting and staining.
I don’t have help today, but I try to get all the pieces I’ll need ready for tomorrow, when I have a friend coming to help.


A friend texts to ask if he can bring his dad to show him the house, and I tell them to come on over.
I give a little tour, and receive compliments on a job well done. 🙂 “Keep doing what you’re doing.”
I go get ready for work, and work for a few hours.
I spend the evening with friends again, and we get Subway.
Wednesday
I wake up early, eat, and get out to the house earlier than usual. I get the last few boards for the back wall cut, and I’m staining the ends when my friend shows up to help.
The first two pieces are a pain, and one splits after it’s already nailed down. 😦 We move on to the back wall, and get 17 rows up before he has to leave to get ready for work.
I get my mum to help for a half hour, and we get 4 more rows up.
Then I get ready for work, and I work for a few hours.
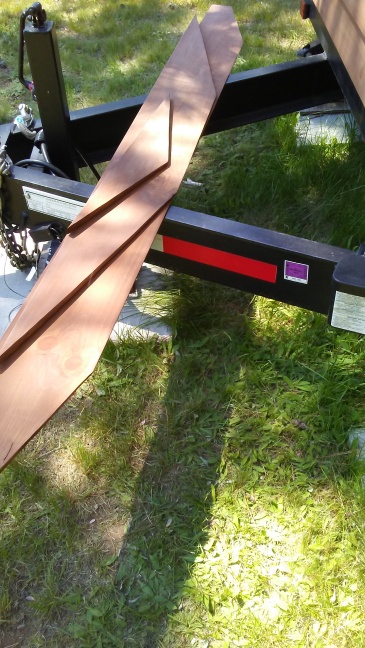
I come straight home, change my clothes, and go out to the house. I measure and cut two angled boards for the end walls in the last hour of daylight.
Then I go in and enjoy my food and Netflix before bed.
Thursday
I sleep in a little bit then have my cereal and yogurt (it keeps me full while I build!)
I get in a few hours of work on the house.
I don’t have help today, but I’m working on the front wall around the octagon.
I cut and test-fit and stain, and since the pieces are short, I’m able to nail them up by myself. I get 3 rows up.
I get ready for work, then I work for a few hours.
I come straight home again and ask for Mum’s help.
We get 2 more rows up on the back before it gets completely dark.
I go out to put gas in my car, pick up some groceries, go to the bank, and I get a burger while I’m out.
Then I finally get to sit, relax with some TV, then a bit of reading before bed. ❤
~
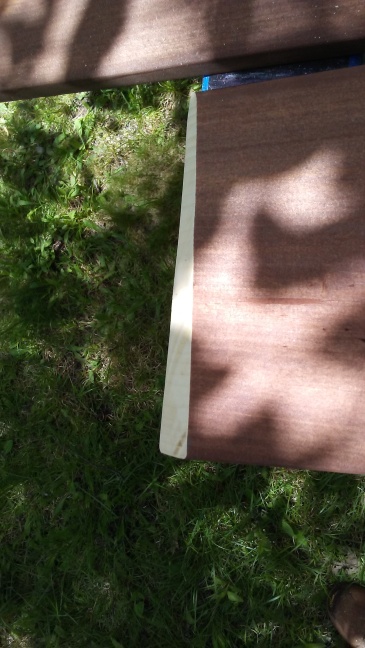
The siding is far from perfect. Gaps here, splits there, less than perfect joints, extra nails… it looks great from a distance. But done is better than perfect, and the siding was definitely doing its job as it poured rain today (I finally took a break). I’ve ordered some caulking in a brown that matches my siding, and I still have a few little pieces to put up and some screw holes to fill and paint over. Then I’ll show you my fully dressed beautiful little house. ❤
28 Dec 2016 Leave a comment
in Building, Buying, Design & Planning, Research Tags: Choices, Exterior, Materials, Siding, Soffits
I couldn’t predict every little thing and research it all before starting the build, because I never would’ve started. There are some things that just don’t come up until it’s time to do them. So I’ve had to continue researching regularly as the build has progressed. This month it’s been about siding: installing it, trim, rain screens, bug screens and soffits, what materials to use and how to put it all together into one working system.
Did you know that exterior window trim is not very common at all? Tiny houses often have painted wood around the windows for a pop of colour. That’s how I’ve always pictured my house, but looking at regular houses around here, most just have fake shutters. The siding meets up with the vinyl around modern windows and that’s all you need. So there’s not really any style options for exterior window trim because no one bothers with it. So I’m spending extra money, time, effort, and weight on the house just to add some colour. My mind was already made up, so I decided on simple 1.5″ x 3.5″ wood for the trim, with angled pieces above the windows so the rain doesn’t collect.

$400 later…
As for a rain screen, it is highly recommended for behind wood siding, if not required. A rain screen is basically an air gap between the house wrap and siding, created by vertical strips of wood, that allows water/condensation to drain down the wall and out the bottom. However, a lot of houses have vinyl siding – which creates its own air gap – these days, so it was harder to find info and materials for a rain screen. Tiny Nest used plastic ventilated strips so the air can move from side to side as well as down, which they were able to order from a local building supply store. When I went asking for those, I was told, “You’re in Nova Scotia, good luck finding that!” Apparently wood siding is more common in B.C. So I went with 3/8″ thick, 1.5″ wide wood lathes for my furring strips. They of course only come in 4′ lengths even though it’d be just a bit easier if they came in 8′ lengths. I considered using strips of plywood, but it wasn’t worth the cutting. I might as well just use what everyone else uses, even though I tried to research and do better.

My friend Shayne helped me put up all the full-length furring strips. I’ll put the rest up after I figure out how to integrate the rain screen with the window trim.
Then there’s bug screen, a mesh at the top and bottom of the rain screen that keeps bugs from getting into the air gap. That was a pile of research too, because there isn’t really a specific product for it. I was going to use simple fiberglass screens, like you have in your windows, because that’s what Tiny Nest used. I was told that it’s a bad idea because rodents will destroy it within the first year. So I shelled out the $50 for a 12″ wide roll of mesh meant to be used for a ridge vent. Around here, apparently they cut it into strips and use it for the bug screen, so that’s what I’m doing. I cut it into 2″ strips and will hopefully have just enough for the whole house, top and bottom.


My ingenious way of cutting a consistent two inches.

All done! 6x 2″ wide strips totaling 120′ in length.
I’ve read that rain screens can function without venting at the top, although they work better with venting at the top and bottom. But then that creates the issue of how to vent the top because there will be soffits there. Most houses have vented soffits so the question is whether or not to vent into them, but my soffits are solid, so I’m having a hard time picturing how that’s going to work. If I put my siding up to my soffits, then that will block off the venting, but if I leave a small gap, it might be visible and strange looking.
Speaking of soffits, what a pain! When I went shopping for a material to cover the underneath of my overhang and eaves, I was told that people often use vented vinyl, so vinyl siding should work. The material is exactly what I wanted and it’s nice and white, but it is so difficult to cut! I have to cut it lengthwise to get the right width and I spent 3 1/2 hours cutting only a fourth of what I need. I’ll have to come up with a better way to cut it than tin snips, but so far they’ve been the only thing sharp enough, and the vinyl is far too flimsy to use power tools on.

Attempting to cut off the interlocking part of the siding.

The first strip finished for under the front or back eaves.

Strips of wood added so I can attach the soffits.

Underneath the back overhang as well. Under the sides I’ll be able to nail to the ends of the rafters.
So I’ve been trying! It’s just been more than I can do in a month to get this all figured out and done right. That’s why I don’t want anyone else working on the house. Who knows if they would’ve bothered even doing a rain screen! I don’t trust people. Last year, I got a quote to get the siding put up for me, which was $1000 and it would take two days. This year, that same guy never returned my call, and a quote from a different company was $1200 and it would take a week, even though I told him all the furring strips, trim and everything would be already done. I’m not paying someone $1200 to do just the siding after doing all the trim and rain screen and soffits myself! He might’ve just been giving me a bit of a higher quote because he didn’t want to do a small job.
There are some amazing professional builders out there, so I should try to remember that. But I’m very happy with how my little house is turning out to be all straight and square. Check out my previous post for more details about where I’m at right now.
28 Dec 2016 Leave a comment
in Building, Random Thoughts Tags: Difficulties, Exterior, Family & Friends, Siding, Snow, Stain
It’s hard for me to keep the blog updated when I feel like I should be spending every free minute researching or building. This month, I’ve discovered that the siding installation is a bit more complicated than I’ve been picturing, as is building a house all by myself!
Let’s recap. Since I last posted, I finished all the staining. I would’ve finished the last boards on the 3rd, as planned, but I ran out of stain for the last set of 12! So I stained the final sides on Dec. 6th after picking up my 5th bucket of stain. The rest of that week was spent getting some car maintenance done before winter and researching how the rain screen, bug screen, trim, and siding will go together. Then winter came early. Normally we have a green Christmas where I live, so I was counting on having a couple more warm weeks to get the trim and siding up. Mother Nature had other plans!

First, it was just a sprinkling of snow. Manageable.

A few icicles.

Then the snow stayed.
I was still determined to keep working on the house, to get the siding up before Christmas. One of my friends offered to help on a sunny day, so we put up most of the furring strips despite the fact that there was snow on the ground. I worked on the house on a couple more nice days and put up some wood underneath the eaves so I could attach the soffits. I started cutting the soffits, which was so much more difficult than I expected.
But it just kept snowing! And then I got sick with a cold. I actually don’t have any more pictures of the house in the snow because I was curled up inside researching rain screens and eating soup. But there was at least a foot of snow on the roof and the weather was nasty. With the wind, snow, and a windchill of -31°C, and being sick, I wasn’t working outside. So I researched and waited for the snow to melt as it usually does. The majority of it did finally melt, but not in time for me to get any more work done before Christmas.
So this is where the tiny house is at, and this is where it will most likely stay until spring:


This isn’t ideal. I really wanted to have the siding up and the house protected properly for winter. At this point, it might even have been better to not have the furring strips up because the snow sticks to them, but there’s no point in taking them down. The Typar will keep the house dry inside, but I only have another 3 months before it should be covered to protect it from UV damage.
It’s discouraging, because I’ve done my best to get everything done before winter, but I simply had too much left to do for one person. I’ve been working on the house as much as I can. I worked on the house 14 days out of October and 19 days out of November. I need to balance the full-time project of the tiny house with working 5-6 days a week whilst still eating, sleeping, and socializing. I’ve only worked on the house 8 days this month, but that’s because it’s been negative temperatures. I’ve also been sick from not eating properly and spending too much time out in the cold. So it sucks. We’ll see what the new year brings.
23 Nov 2016 Leave a comment
in Building Tags: Choices, Oops, Siding, Stain
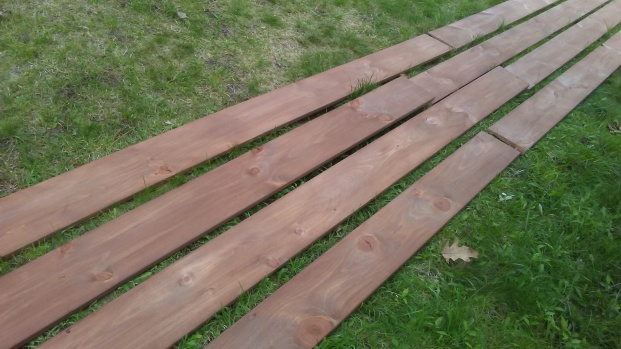
After installing all the windows, it was time to pick a stain colour for my siding! Which I was avoiding, because it’s a big decision! I’m doing pine beveled siding, and the colour I choose is going to be the colour of the entire exterior of my house! I also looked at paint colours for my door, post, and exterior trim, but I’m not revealing those yet. 😉
I wanted a stain that would still show the grain of the wood. Some people don’t like how many knots pine has, but I don’t mind at all – which is convenient, because pine is one of the cheapest and lightest wood types. 😛 I like the personality in wood grain, and I’m so happy to be able to use real wood for my house instead of plastics and particle board. 🙂 There weren’t that many options for semi-transparent stains, so it didn’t take me long to choose…

I was aiming for not too red/orange and not too grey, and this seemed like the best one!
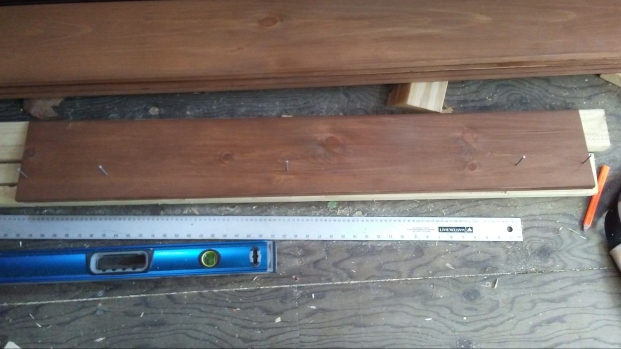
I’ve been going to a different hardware store, and the staff have been really helpful and gave me a great price on the stain. 🙂 I started staining on November 7th, in the heated garage (thanks parents!), and I’ve been staining almost every day and sometimes twice a day since! I learned that the wood fibers on the smooth side of the siding get heated while the wood is being cut, creating what’s called “mill glaze”. This closes the grain of the wood from accepting stain, so I have spent several days sanding my siding as well. It’s been a process!
I’ve really learned how to manage my time better and fit staining into my day, more than any other part of the build so far. With other tasks, I’ve usually been doing things for the first time so I never know how long it’s going to take. Then when I get the hang of it, I’m done and move on to another new thing. With the staining, it’s easy work, and I’ve already gotten plenty of practice, so I know exactly what to do and how long it’s going to take me. Instead of wondering how long it will take or having to wait until a day off, I know I need about two hours and I can get a decent amount done. That knowledge takes away the uncertainty that makes me hesitate. It’s easier to get out there and work on it, no matter my mood or the time of day, because I know exactly what I’m doing. I can blast my music, take the time to think, and go out to the garage rain or shine, day or night. It’s great!
The one thing limiting me is space. The garage is filled with stuff for renovations in my parents’ house, and I only have so much room on the sawhorses. At first, I decided I would stain 6 boards a day. I have room for five on the sawhorses, and one more on a stack of wood. And since I’d be staining every day, I didn’t want to allot too much. I have to stain the front and back in case water gets behind the siding, so that’s a lot of staining! Doing 6 boards a day and giving them 24 hours to dry before stacking them meant that it would take me 32 days to stain all of my siding. At first, I was okay with that because I had expected it to take a long time. Plus I was probably going to get someone else to install it for me later, so my work would be done when I finished the staining.
After about a week, I started doing a little more research, and any day I didn’t stain meant one more day into December I would need to stain. So I decided to start staining 12 boards a day, 6 during the day and 6 after work (I’m working 6 nights a week right now). I found more stacks in the garage to put boards on, and made room underneath the sawhorses for 3-4 boards. I also started to think about installing the siding myself. The only thing stopping me was a lack of help, and a few people offered theirs recently. I really didn’t want to spend the money and the more I thought about it, the less I wanted some stranger doing a mediocre job (or worse) on my house! I’ve done everything on it, except the welding and insulation, and I’m reluctant to let anyone else touch my house.
I’ve gotten faster at staining, and I’m usually pretty tired and/or cranky after work, so I switched to staining 12 boards during the day time. It is a bit of a musical chairs game with the boards but it’s working out so far. I’m 47% finished staining, and I hope to be done within the first few days of December. Take a look at my work so far, and remember, as always, I’ve never done this before! 😛


Aaaand this is why I no longer stain at night:

Don’t kick your stain bucket. 😛
All is well, and I’m getting this done as fast as I can! It’s getting colder outside…
